Conway's game of life, was devised by John Conway in 1970 and is a way of modelling very simple cell population dynamics. The game takes place on a two dimensional board containing a grid of orthogonal cells. The game is technically a zero player game in that the initial setup of the game dictates the eventual evolution of the board.
The rules of the game (taken from wikipedia) are as follows.
- Any live cell with fewer than two live neighbours dies, as if by underpopulation.
- Any live cell with two or three live neighbours lives on to the next generation.
- Any live cell with more than three live neighbours dies, as if by overpopulation.
- Any dead cell with exactly three live neighbours becomes a live cell, as if by reproduction.
For every 'tick' of the game board the rules are evaluated and each cell is kept alive, given life or killed. Through these simple rules a great deal of complexity can be generated. This is the simulation running on a 100 by 100 game board for 100 frames.
If you look up Conway's game of life you will see a large collection of examples and programs that can be used to generate the game. It is often used as a teaching aid in computer science both in terms of data science but also as a very simple introduction to artificial intelligence.
I have previously written about creating Conway's game of live in PHP, which was quite limited due to the limitations of PHP.
The Python Tkinter Canvas widget is an ideal environment for creating Conway's game of live as it allows is to create shapes in a grid structure needed for the game to play out. The ability to add events also allows us to interact with the gameboard directly and add new cells.
Creating The Grid
The first step is to create the objects needed for the application and draw the grid. We do this by extending the Tk application class into our new game_of_life class. Doing this means we inherit all of the methods and attributes that the parent class has, which means we can create a modular Tkinter application quite easily.
In the code below, the Canvas will always be a square and the size will be controlled through the width_and_height property. We use the resolution property to control how large each square on the game grid will be, which means we can make the grid as big or as small as we need. Using these two properties we work out some geometry for the application, create the Canvas widget, and then generate a random game board using a multi-dimensional array.
The array represents a alive cell with a "1" and a dead cell with a "0", which we pick using the Python random module. We will use this array to represent the data behind the game, and will work on rendering that onto the canvas in the next step.
import tkinter as tk
from tkinter import Canvas
import random, math

class game_of_life(tk.Tk):

    def __init__(self, width_and_height = 400, resolution = 100):
        super().__init__()

        self.title("Game of life")

        # Prevent the application window from being resized.
        self.resizable(False, False)

        # Set the height and width of the applciation.
        self.width_and_height = width_and_height
        self.resolution = resolution
        self.size_factor = self.width_and_height / self.resolution

        # Set up the size of the canvas.
        self.geometry(str(self.width_and_height) + "x" + str(self.width_and_height))

        # Create the canvas widget and add it to the Tkinter application window.
        self.canvas = Canvas(self, width=self.width_and_height, height=self.width_and_height,  bg='white')
        self.canvas.pack()

        # Set up an empty game grid.
        self.grid = [[0 for x in range(self.resolution)] for x in range(self.resolution)]

        # Fill the game grid with random data.
        for x in range(0, self.resolution):
            for y in range(0, self.resolution):
                self.grid[x][y] = random.randint(0, 1)

if __name__ == "__main__":
    # Create the class and kick off the Tkinter loop.
    tkinter_canvas = game_of_life(500, 50)
    tkinter_canvas.mainloop()
With the object initialisation method in place we just need to create the code that will render the game board onto the canvas widget.
All we need to do here is loop through the multi-dimensional array and if the current cell is alive (represented by a "1" in the cell) then we draw a square in the game board at the correct coordinates. The coordinates are worked out by multiplying the current cell number by the size_factor property that we set up at the start.
    def generate_board(self):
        # Draw a square on the game board for every live cell in the grid.
        for x in range(0, self.resolution):
            for y in range(0, self.resolution):
                realx = x * self.size_factor
                realy = y * self.size_factor
                if self.grid[x][y] == 1:
                    self.draw_square(realx, realy, self.size_factor)
The draw_square() method is just an abstraction around the Canvas create_rectangle() method and just means the generate_board() method doesn't have long lines.
    def draw_square(self, y, x, size):
        # Draw a square on the canvas.
        self.canvas.create_rectangle(x, y, x+size, y+size, fill='black', outline='black')
We can now add the call to generate_board() to the __init__() method so that when we run the application the game board will be drawn.
        # Genearte the game board.
        self.generate_board()
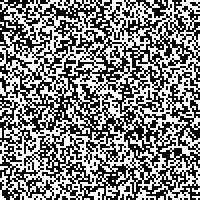
Running all of the above code produces the following application.
This is a great start, but this is just a static canvas. The next step is to setup the animation so that we can simulate the different generations of the game.
Animating The Game Board
The first thing to figure out is the rules of the game of life. As we need to look at the current game board and change the positions of every item in that board we first make a blank copy of the game board. Then we loop through every cell in the current game board and see how many neighbours that cell has. Using this information we then have a few choices, but ultimately we are either making a cell alive with a "1" or dead with a "0". Every cell in the grid must be inspected in this way as the rules apply to empty cells as well as alive cells. The output of the run_generation() method is a new grid containing the result of the rules being applied to the current grid.
    def run_generation(self):
        # Generate new empty grid to populate with result of generation.
        return_grid = [[0 for x in range(self.resolution)] for x in range(self.resolution)]

        # Iterate over the grid.
        for x in range(0, self.resolution):
            for y in range(0, self.resolution):
                neighbours = self.number_neighbours(x, y)
                if self.grid[x][y] == 1:
                    # Current cell is alive.
                    if neighbours < 2:
                        # Cell dies (rule 1).
                        return_grid[x][y] = 0
                    elif neighbours == 2 or neighbours == 3:
                        # Cell lives (rule 2).
                        return_grid[x][y] = 1
                    elif neighbours > 3:
                        # Cell dies (rule 3).
                        return_grid[x][y] = 0
                else:
                    # Current cell is dead.
                    if neighbours == 3:
                        # Make cell live (rule 4).
                        return_grid[x][y] = 1
        return return_grid
The number_neighbours() method from the above code is used to quickly see how many alive cells the current coordinates of the grid has. This takes the current coordinates and looks are the cells directly surrounding the current cell. This is done in a loop to prevent lots of fragile "if" statements being added to the code. If the cell happens to be at the corners or edge of the grid then we use some simple error detection to just ignore the fact that we are trying to reference cells that might not exist.
    def number_neighbours(self, x, y):
        count = 0

        '''
        Count the number of cells that are alive in the following coordiantes.
        -x -y | x -y | +x -y
        -x  y |      | +x  y
        -x +y | x +y | +x +y
        '''
        xrange = [x-1, x, x+1]
        yrange = [y-1, y, y+1]

        for x1 in xrange:
            for y1 in yrange:
                if x1 == x and y1 == y:
                    # Don't count this cell.
                    continue
                try:
                    if self.grid[x1][y1] == 1:
                        count += 1
                except IndexError:
                    continue
        return count
Now we just need a mechanism to run the run_generation() method and use that output to generate the squares on the canvas. The update_board() method takes care of this. The first step here is to clear all items that already exist on the canvas as we would otherwise be generating our new game board on top of the old one, which would be a mess and keep canvas elements around that we didn't want.
The output of the run_generation() method is applied to the current grid here so that the new generation of the game replaces the old. After that we just need to call the generate_board() method again to draw all of the squares for our canvas. The final line in the update_board() method is to kick off a repeating timer that will call the update_board() method again every 100ms. This creates the effect of the board updating over and over again.
    def update_board(self):
        # Clear the canvas.
        self.canvas.delete("all")
        # Run the next generation and update the game grid.
        self.grid = self.run_generation()
        # Generate the game board with the current population.
        self.generate_board()
        # Set the next tick in the timer.
        self.after(100, self.update_board)
Finally, in the __init__() method we add a final call to the timer to update the game board. With this in place the game will kick off as soon as the application starts.
        # Start the timer.
        self.after(100, self.update_board)
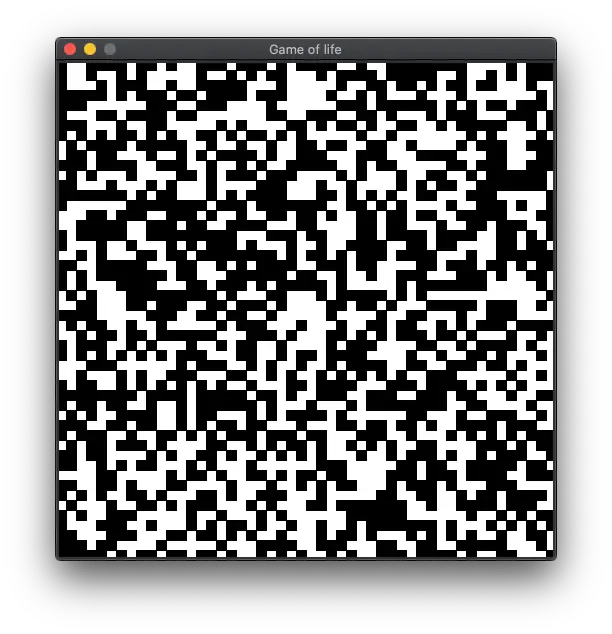
Putting all of this together creates the following application.
via GIPHY
Now that we have a fully working application let's add some user interaction to it.
Adding User Interaction
One of the neat things about creating the game of life in Tkinter and Python is that we can add user events to the application to draw new cells. Without this in place the game of life would (eventually) stop and be a little boring.
That's one of the interesting things about Conway's game of life is that it is very difficult to predict how long the game will progress for until a static game board is reached. There are certain structures (some of which can be seen in the above animation) that are stable and so do not move. Once all of the cells have reached a state like this there there is little or no movement then the game is said to have "stopped".
I have added two events to the canvas widget. These are "Button-1" to listen to the primary mouse button being pressed and "Button1-Motion" to listen to the mouse being moved whilst the button is held down. Both of these events will trigger a method called canvas_click_event().
        # Set a click event on the canvas.
        self.canvas.bind('<Button1-Motion>', self.canvas_click_event)
        self.canvas.bind('<Button-1>', self.canvas_click_event)
The canvas_click_event() is pretty simple. All we need to do is translate the coordinates of the current mouse position (held in the properties event.x and event.y) to fit within the current game grid. We then just set that grid item to be alive with a 1 in the cell.
    def canvas_click_event(self, event):
        # Work out where the mouse is in relation to the grid.
        gridx = math.floor((event.y/self.width_and_height)*self.resolution)
        gridy = math.floor((event.x/self.width_and_height)*self.resolution)

        # Make that cell alive.
        self.grid[gridx][gridy] = 1
With that in place we can move the mouse pointer across the application window to generate new life and keep the game in an active state.
Next steps in this application would be to allow the game to be paused, or to start the game with a non-random grid so that the game will progress in a predictable manner. You can even experiment with the colours and rules of the game to create different effects or simulations.
If you want all of the code here in full then check out the Conway's game of life GitHub gist I created.

Add new comment