Since my last post, where I talked about drawling a line with pixels in PHP, I have been looking at drawing circles. As it turns out, there are a few different ways to draw a circle, so I'll go through a few options here.
To start with, there are some built in functions in PHP that can be used to draw an arc, circle or ellipse as a filled in shape or a line. The built in function in PHP called imageellipse() that can be used to draw a circle. This is part of the GD library.
<?php

// Generate image.
$im = imagecreatetruecolor(255, 255);

// Create a colour.
$white = imagecolorallocate($im, 255, 255, 255);

// Draw a cirlce in the middle of the image.
imageellipse($im, 128, 128, 200, 200, $white);

// Save the image to a file.
imagepng($im, 'circle.png');

// Destroy the image handler.
imagedestroy($im);
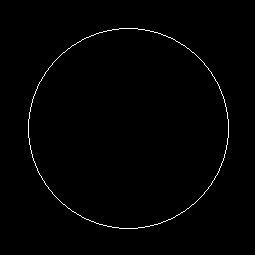
This code produces the following image.

The imageellipse() function takes a quite a few parameters but can be used to draw a circle or an ellipse depending on the parameters supplied. To draw a filled in circle you can use the imagefilledellipse() function, which takes the same parameters but draws a filled in circle.
How can you draw a circle without using the built in PHP functions? The simplest way is to draw a filled in circle by drawing a series of lines out from a center point. For every degrees in the circle we use the formula:
x = radius * cos(angle)
y = radius * sin(angle)
What we are doing here is working out the point subtended by the point at the circle's center. This is the angle at a particular point when straight lines from the farthest point are joined together. So essentially, this is a line drawn from the center of a circle to the outer edge.
With this in hand all we need to do is loop through all of the angles in a circle (i.e. 360) and draw a line from the center point to the coordinates calculated by the above equations.
<?php

// Generate an image.
$im = imagecreatetruecolor(255, 255);

// Create a colour.
$white = imagecolorallocate($im, 255, 255, 255);

// Set the line thickness to 4.
imagesetthickness($im, 4);

// Set the center point of the circle.
$centerX = 128;
$centerY = 128;

// Set the radius of the circle.
$radius = 100;

// The angle what will be incremented for each loop.
$theta = 0;

while ($theta <= 360) {
  // Calculate the new x,y coordinates.
  $x = $centerX + $radius * cos($theta);
  $y = $centerY + $radius * sin($theta);

  // Increment theta.
  $theta += 1;

  // Draw a line from the centrer point to the x,y coordinates.
  imageline($im, $centerX, $centerY, $x, $y, $white);
}

// Save the image to a file.
imagepng($im, 'circle-filled.png');

// Destroy the image handler.
imagedestroy($im);
Note that this code also includes a call to imagesetthickness(), which we increase to 4, which is in order to create a fully filled circle. Without this call in place the outer edges of the circle do not mesh together properly and the circle is not completely filled. This can also be sorted by increasing the number of steps when incrementing $theta, but that also means increasing the number of times we need to run the loop. Increasing the thickness of the line drawn is an easy way to solve this.
This code produces the following output.

To draw a circle that isn't filled we just need to swap out the imageline() function with a call to imagesetpixel(). This essentially draws a pixel at the end of the projected line.
imagesetpixel($im, $x, $y, $white);
With that change the following circle is created.

If this looks a little janky then it it's because many of the dots aren't connected. This cos/sin method is good for small circles, but the larger the circle gets the more distant the dots get to each other and so we need to increase the number of iterations of the loop to close this gap.
A better algorithm to draw a circle is the Bresenham’s circle drawing algorithm. This is related to the Bresenham’s line drawing algorithm, but here we go through each point along the circumference of the circle and make a decision about what pixel we should draw in order to best fit a circle.
The first step is to divide the circle into 8 segments of 45 degrees each. Because circles are symmetrical all we need to do is work out a single segment and then we can transform that segment to the other 7 segments. This means we don't have to loop all the way around the circle, only through one of the segments.
Using the coordinates of the center of the circle we can work out the first point in each of the segments.
centerX + x, centerY + y
centerX + y, centerY + x
centerX - y, centerY + x
centerX - x, centerY + y
centerX - x, centerY - y
centerX - y, centerY - x
centerX + y, centerY - x
centerX + x, centerY - y
We can then start working out where each of the points along the first segment lies. The first decision is worked out based on the formula $decision = 3 - (2 * $radius).
The decision of where to draw the next pixel is calculated using the following:
- If the decision is less than 0 then the next pixel will be drawn at (x+1, y). We then work out the decision based on the formula $decision = $decision + (4 * $x) + 6. We also increment x.
- If the decision is greater then 0 then the next pixel will be drawn at (x+1, y-1). We then work out the decision based on the formula $decision + 4 * ($x - $y) + 10. We also increment x and decrement y.
Once x and y converge we can stop as we will have worked out all of the points in the circle. The maths here is derived from the equation of a circumference of a circle, which is x2 + y2 - r2. I found this page was a good introduction to this maths (although it does take a while to understand what is going on).
The following code puts all this into practice.
<?php

// Generate an image.
$im = imagecreatetruecolor(255, 255);

// Create a colour.
$white = imagecolorallocate($im, 255, 255, 255);

// Set the center point of the circle.
$centerX = 128;
$centerY = 128;

$radius = 100;

$x = 0;
$y = $radius;

// Calculate the initial decision
$decision = 3 - (2 * $radius);

while ($x <= $y) {
  // Put a pixel in each of the 8 segments of the circle.
  imagesetpixel($im, $centerX + $x, $centerY + $y, $white);
  imagesetpixel($im, $centerX + $y, $centerY + $x, $white);
  imagesetpixel($im, $centerX - $y, $centerY + $x, $white);
  imagesetpixel($im, $centerX - $x, $centerY + $y, $white);
  imagesetpixel($im, $centerX - $x, $centerY - $y, $white);
  imagesetpixel($im, $centerX - $y, $centerY - $x, $white);
  imagesetpixel($im, $centerX + $y, $centerY - $x, $white);
  imagesetpixel($im, $centerX + $x, $centerY - $y, $white);

  // Increment value of x.
  $x++;

  if ($decision < 0) {
    // The next pixel will be drawn at (x + 1, y).
    $decision = $decision + (4 * $x) + 6;
  }
  else {
    // The next pixel will be drawn at (x + 1, y - 1).
    $decision = $decision + 4 * ($x - $y) + 10;
    // Decrement the value of y.
    $y--;
  }
}

// Save the image to a file.
imagepng($im, 'circle.png');

// Destroy the image handler.
imagedestroy($im);
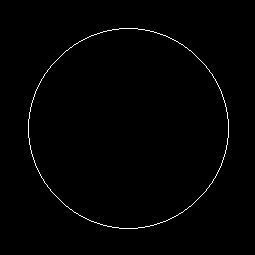
This is what the code produces.

As you can see, this is a much more refined circle and contains no gaps or other errors. This algorithm can be refined, and I have even seen examples where only bit shifting is used which makes it far more efficient.


Add new comment