Since my last visit to this subject I have been thinking about how to represent a collection of random colours so that it looks sorted and that no information is lost during that process. I quickly realised that I needed to use all three aspects of the colour space, which lends itself to generating 3D objects. Indeed, the red, green, blue colour space is built around a cube so it can often be represented as a cube.
The hue, saturation, and value colour space is built around the concept of a cylinder, which means that 2 of the axis lend themselves to a circumference of a circle (the hue) and the diameter of a circle (the saturation). This is an example of the polar coordinate system. We can therefore draw a circle using hue and saturation and the value can be used to represent a different aspect of the colour space.
You might have already seen the hue and saturation used to draw a circle in something called a colour wheel. This is a favourite of applications that allow you to pick a colour. Here is an example from the Pages application on a Mac.
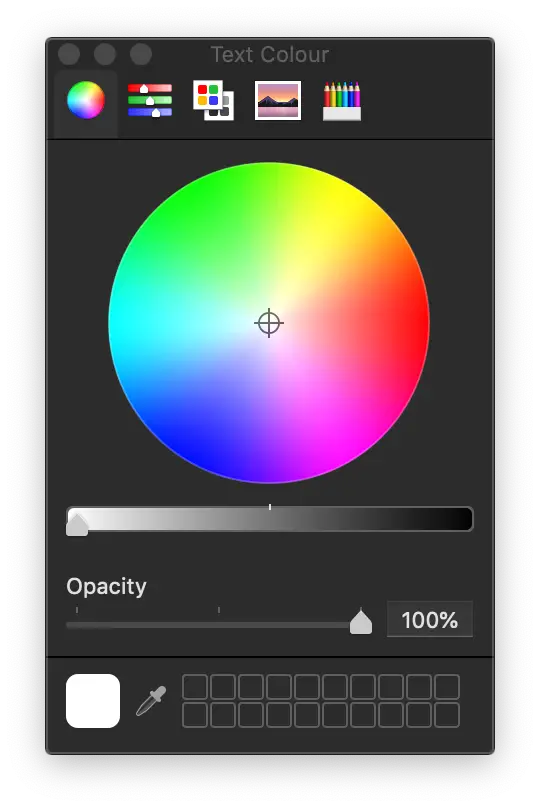
One thing to realise is that the value is actually underneath the colour wheel, in which case what we are looking at is the same problem I am trying to overcome. Namely, removing some of the data to make the wheel work. What I want to do is incorporate the value into the colour wheel so that we can represent all three at once.
To start with I need to create a Colour class. This accepts red, green and blue and calculates the hue, saturation and value based on these values.
class Colour {
    public $red = 0;
    public $green = 0;
    public $blue = 0;

    public $hue;
    public $saturation;
    public $value;

    public function __construct($red, $green, $blue)
    {
        $this->red = $red;
        $this->green = $green;
        $this->blue = $blue;

        $this->calculageHsv();
    }

    function calculageHsv() {
      $red = $this->red / 255;
      $green = $this->green / 255;
      $blue = $this->blue / 255;

      $min = min($red, $green, $blue);
      $max = max($red, $green, $blue);

      switch ($max) {
        case 0:
          // If the max value is 0.
          $hue = 0;
          $saturation = 0;
          $value = 0;
          break;
        case $min:
          // If the maximum and minimum values are the same.
          $hue = 0;
          $saturation = 0;
          $value = round($max, 4);
          break;
        default:
          $delta = $max - $min;
          if ($red == $max) {
            $hue = 0 + ($green - $blue) / $delta;
          } elseif ($green == $max) {
            $hue = 2 + ($blue - $red) / $delta;
          } else {
            $hue = 4 + ($red - $green) / $delta;
          }
          $hue *= 60;
          if ($hue < 0) {
            $hue += 360;
          }
          $saturation = $delta / $max;
          $value = round($max, 4);
      }

      $this->hue = $hue;
      $this->saturation = $saturation;
      $this->value = $value;
    }
}
To generate the colours I created a loop that created 1000 random colours based on their red, green and blue values.
for ($i = 0; $i <1000; $i++) {
  $red = ceil(mt_rand(0, 255));
  $green = ceil(mt_rand(0, 255));
  $blue = ceil(mt_rand(0, 255));

  $colours[] = new Colour($red, $green, $blue);
}
This generates 100 colours, which is good enough to start seeing the sorting working, but without so many colours that we just create a colour wheel and can't see the difference between the colours present.
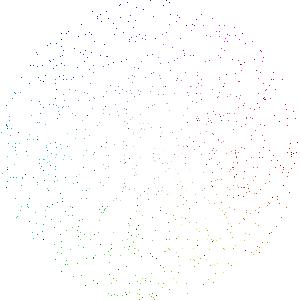
The first step is to generate the colour wheel using just pixels. There is plenty of comments in the code, but the drawing of the pixels along the circumference of the circle is done using the same maths that I employed when drawing circles in a previous post. Essentially, we use the hue to work out what angle the pixel should lie at and then use the saturation to work out how far that pixel should be from the centre of the circle.
function colourWheelPixels($colours) {
  // Set the width and height of the image.
  $width = $height = 300;

  // Create the image handler.
  $im = imagecreatetruecolor($width, $height);

  // Set a background colour of white and fill the image with it.
  $bgColour = imagecolourallocate($im, 255, 255, 255);
  imagefill($im, 0, 0, $bgColour);

  // Calcualte the centre of the image, based on the width and height.
  $centerX = $centerY = $width / 2;

  foreach ($colours as $colour) {
    // Create a colour.
    $allocatedColour = imagecolorallocate($im, $colour->red, $colour->green, $colour->blue);

    // Calculate the radius of the colour based on the saturation.
    $radius = $colour->saturation * $centerX;

    // We need to convert the degrees to radians so we can position the pixel on the
    // correct point on the circumference of the circle.
    $angle = deg2rad($colour->hue);

    // Calculate the x,y coordinates of the hue and offset it by the radius.
    $x = $centerX + $radius * cos($angle);
    $y = $centerY + $radius * sin($angle);

    // Place the coloured pixel in the calculated position.
    imagesetpixel($im, $x, $y, $allocatedColour);
  }

  // Create the image and destroy the image handler.
  imagepng($im, 'colour-wheel-pixels-' . time() . '.png');
  imagedestroy($im);
}
This generates the following image. It's quite faint, and we are still missing some of the colour information, but the colours are obviously sorted.
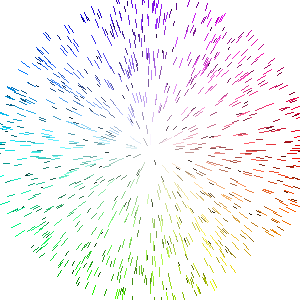
The first way I thought to show integrate the value into the colour wheel was to use lines. Using the worked out coordinate from the saturation and hue I just drew a line that pointed away from the centre of the circle. We just use the imageline() function to create this line. The length of the line is proportional to the value of the colour. This means that lighter colours are longer and darker colours are shorter.
function colourWheelLines($colours) {
  $width = $height = 300;
  $im = imagecreatetruecolour($width, $height);

  $bgColour = imagecolorallocate($im, 255, 255, 255);
  imagefill($im, 0, 0, $bgColour);

  $centerX = $centerY = $width / 2;

  foreach ($colours as $colour) {
    $allocatedColour = imagecolorallocate($im, $colour->red, $colour->green, $colour->blue);

    $radius = $colour->saturation * $centerX;

    $angle = deg2rad($colour->hue);

    $x = $centerX + $radius * cos($angle);
    $y = $centerY + $radius * sin($angle);

    // Draw a line from the calculated x,y coordinates away from the center.
    $x2 = $x + ($colour->value * 10) * cos($angle);
    $y2 = $y + ($colour->value * 10) * sin($angle);
    imageline($im, $x, $y, $x2, $y2, $allocatedColour);
  }

  imagepng($im, 'colour-wheel-lines-' . time() . '.png');
  imagedestroy($im);
}
This code produces the following output. The colours are much more apparent in this example and it's clear that the they have been sorted.
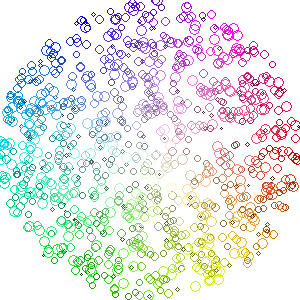
The next idea I had was to use circles to show the value. This came in two forms, circles and filled circles.
The circles based on the value of the colour were pretty easy to generate using the imageellipse(). The value was multiplied by 10 in order to make the circles it draws visible (value is a decimal value between 0 and 1).
function colourWheelCircles($colours) {
  $width = $height = 300;
  $im = imagecreatetruecolor($width, $height);

  $bgColour = imagecolorallocate($im, 255, 255, 255);
  imagefill($im, 0, 0, $bgColour);

  $centerX = $centerY = $width / 2;

  foreach ($colours as $colour) {
    $allocatedColour = imagecolorallocate($im, $colour->red, $colour->green, $colour->blue);

    $radius = $color->saturation * $centerX;

    $angle = deg2rad($colour->hue);

    $x = $centerX + $radius * cos($angle);
    $y = $centerY + $radius * sin($angle);

    // Calculate the size of the little circles based on the value.
    $colourSize = $colour->value * 10;
    imageellipse($im, $x, $y, $colourSize, $colourSize, $allocatedColour);
  }

  imagepng($im, 'colour-wheel-circles-' . time() . '.png');
  imagedestroy($im);
}
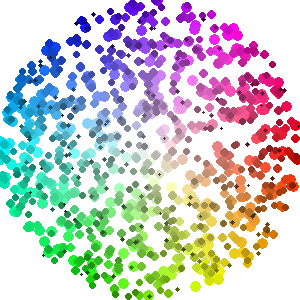
This produces the following image. It's very clear from this image that we have formed a colour wheel, and the circles are a nice way of representing the value of the colours.
The filled circles use the same code, but in this case they use the imagefilledellipse() function to generate the circle.
function colourWheelFilledCircles($colours) {
  // Sort the colours by the value to prevent any overlapping of colours.
  usort($colours, function ($a, $b) {
    return $b->value <=> $a->value;
  });

  $width = $height = 300;
  $im = imagecreatetruecolor($width, $height);

  $bgColour = imagecolorallocate($im, 255, 255, 255);
  imagefill($im, 0, 0, $bgColour);

  $centerX = $centerY = $width / 2;

  foreach ($colours as $colour) {
    $allocatedColour = imagecolorallocate($im, $colour->red, $colour->green, $colour->blue);

    $radius = $colour->saturation * $centerX;

    $angle = deg2rad($colour->hue);

    $x = $centerX + $radius * cos($angle);
    $y = $centerY + $radius * sin($angle);

    // Calculate the size of the little circles based on the value.
    $colourSize = $colour->value * 10;
    imagefilledellipse($im, $x, $y, $colourSize, $colourSize, $allocatedColour);
  }

  imagepng($im, 'colour-wheel-filled-circles-' . time() . '.png');
  imagedestroy($im);
}
This produces the following image.
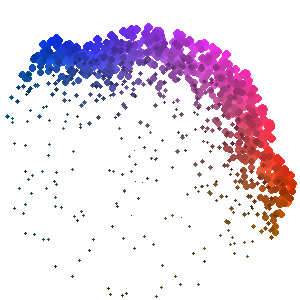
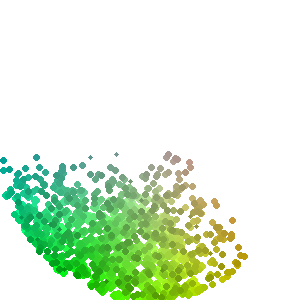
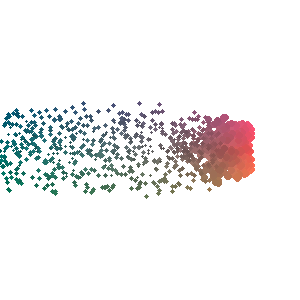
Everything there appears to be working, but the random collection of colours I am using isn't lending itself well to the idea that these colours are sorted. To demonstrate that the colours are sorted I decided to take a subsection of colours, rather than colours from all over the spectrum, and show them in the colour wheel.
Here are some examples of using just sections of the colour spectrum to generate colour wheels.
Incidentally, I did have a go at generating all of the colours available as Colour objects. This was essentially 16,777,216 different colours (256 red x 256 green x 256 blue). Creating this many objects and rendering them using any of the above functions takes about 4gig of memory in PHP. This does, however, generate a perfect colour wheel.
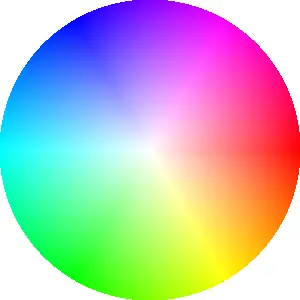
That image was generated using the original pixels approach to creating the colour wheel, but it proves that if we saturate the colours space available we get a perfect circle.
Personally, I think generating a filled circle colour wheel is a good way of representing the spectrum of colours available in a given data set.

Add new comment